Oxenfree 2: Lost Signals Complete Walkthrough

Oxenfree 2: Lost Signals has been a long time coming. After Night School Studios debut title, Oxenfree, was released in 2016, fans have been wanting the sequel and have had to wait over half a decade for it. But it’s here now, available on Switch, PS4, PlayStation 5, PC, Mac, and even Netflix. In fact, that Netflix audience might even bring a new audience to the game and the genre, so our Oxenfree 2: Lost Signals walkthrough might be exactly what you need, especially if you’re new to the genre.
While the sequel does stay true to a lot of the ideas from the first game, it’s more puzzle orientated and has some optional quests that require you to use the old grey matter a bit, and our Oxenfree 2: Lost Signals walkthrough is going to solve all that and more for you, so let’s get started. Oh and be warned, to get 100% for the trophies or achievements, and to see all the endings, you will need to play through the game more than once, as there’s no way to manually save.
Also bear in mind that although this walkthrough will point out collectibles and side content as they come up, the purpose of this is to guide you along the critical path. We have more detailed guides for the side missions, trophies, and collectibles.
Oxenfree 2: Lost Signals Complete Walkthrough
Jump to:
Part 1: Getting Started and the First Transmitter
Part 2: Returning to the First Transmitter
Part 3: Jacob’s Cabin
Part 4: The Caves
Part 5: The Second Transmitter
Part 6: The Ranger Station
Part 7: The Third Transmitter
Part 8: The North Camena Community Centre
Part 9: Garland and the final Transmitter
Part 10: Before you go any further…
Part 11: The Final Push
Part 1: Getting Started and the First Transmitter
Oxenfree 2: Lost Signals begins with protagonist Riley waking up beneath an old lighthouse. Her radio will buzz, and a voice on the other side will talk. You won’t be able to make out most of it, so push on towards the steps and head on upwards to a graffiti-covered house above you. Go inside, ignoring the mess, and climb up towards the lighthouse. Interact with the tear and go through, and you’ll see a woman watching the sea. Talk to her to trigger a short scene.
Riley will now wake up on a bus stop bench in the town of Camena. Her radio is buzzing again, and this time it’s Evelyn, her new supervisor. She’ll give you details about your new job. It doesn’t really matter how you respond, but you can ask more about how certain things will work in the game and get some backstory about Riley and why she’s in Camena.

Evelyn will tell you to go up to the General Store and get your climbing gear, as you’ll be planting transmitters up and down the coast. Follow her instructions and head up to the General Store. She’ll take the time to fill you in on how the walkie-talkie works, so pay attention as you’ll be using it a lot throughout the game.
The General Store will be locked, so call Evelyn on Channel 7 and she’ll direct you to find Jacob Summers, your new partner. Head up the hill, past the bulletin board (which you can interact with), and walk towards Copper Creek Trail.
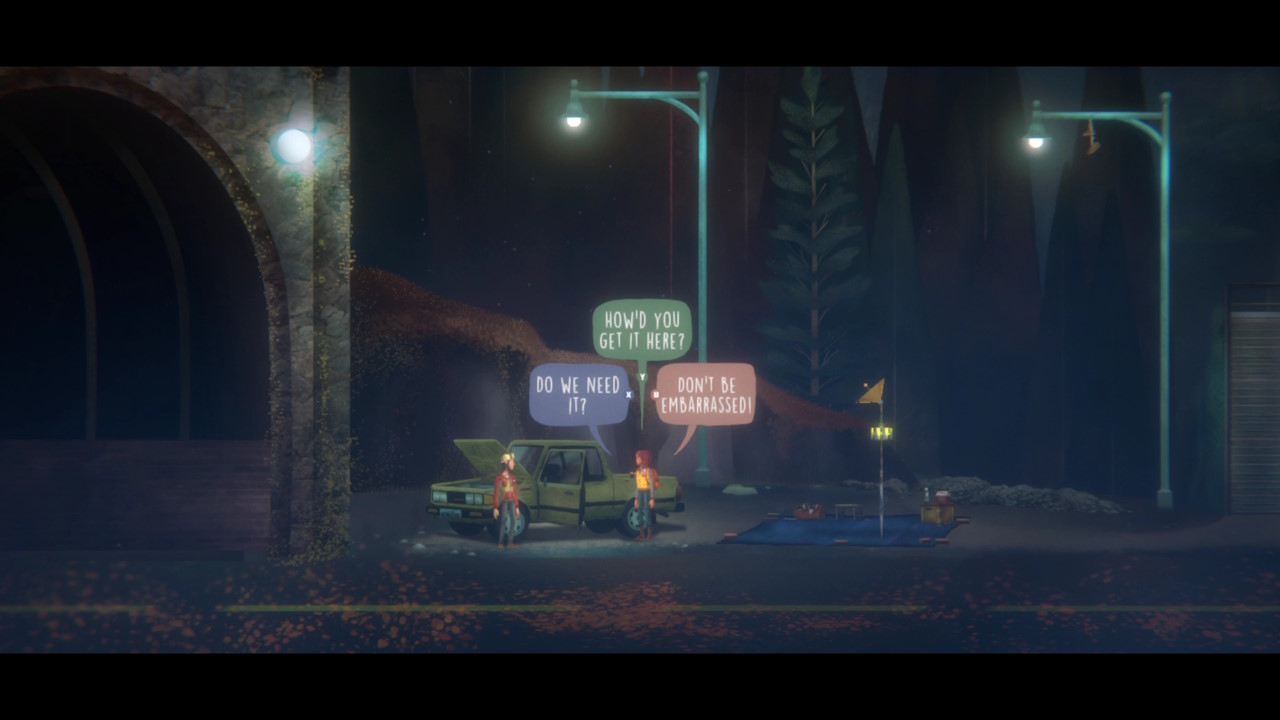
Continue to follow the path upwards, over the bridge, and then head downwards at the notice board. You’ll find Jacob having car trouble. Talk with him and then with Evelyn over the radio. You can choose to be nice or not, but if you’re looking to make friends with Jacob (which several trophies rely on), try to be nice and encouraging with him where possible. His car is wrecked, so you’ll need to proceed on foot. Jacob has the first transmitter you need, and he will give you a radio with which to tune into the local airwaves. This is a crucial tool that you’ll need throughout the adventure.
Once you’re on the move again, head upwards with Jacob towards the Pemmican Trailhead, which will lead all the way up past a creepy little shrine, a ledge you’ll need to shimmy over, and eventually a pair of benches. Choose to rest with Jacob or push on, and continue upwards. In the next screen you’ll come to a locked gate. Call Evelyn and she’ll ask you to get creative, so climb the nearby rockface, jump across the ledge above, and follow the path round until you’re on the other side of the gate. Unlock it for Jacob to come through.

Now you need to head up a bit further, past an animal burrow you can interact with (and where there’ll be a collectible later on), and you’ll find a little shelter overlooking a view of Edwards Island. Hop over the rail and down to the outcrop, where you can place the first transmitter. You’ll need to align the dish, which is a simple case of moving the sticks around until the light on the readout turns blue.
Once the dish is aligned, a short cutscene will play which will see a strange portal open over Edwards Island. Riley will now jump to two other destinations where all you can do is choose dialogue. The first is her with a young boy, the second is her on the beach with three kids wearing creepy masks, one of whom will approach you. After a short time, Riley will wake up on the bus stop bench in town again, with Evelyn on the radio.
Part 2: Returning to the First Transmitter
Riley takes the timeloop surprisingly well, so talk to Evelyn and then head up to the general store. As you approach it, the window will smash and the teen from the beach will come through. Whatever you say to her, you’ll immediately wake up back on the bench. Head back up to see the General Store ablaze, with the girl apparently talking to a glowing red spirit.
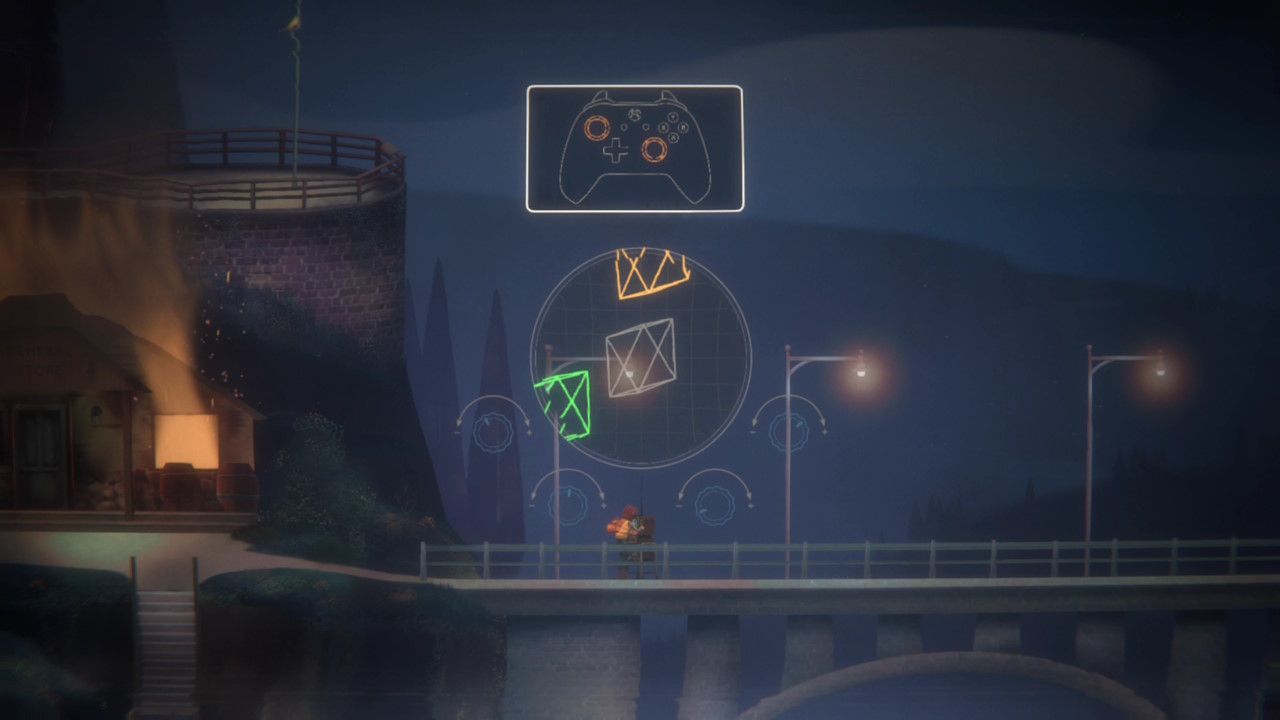
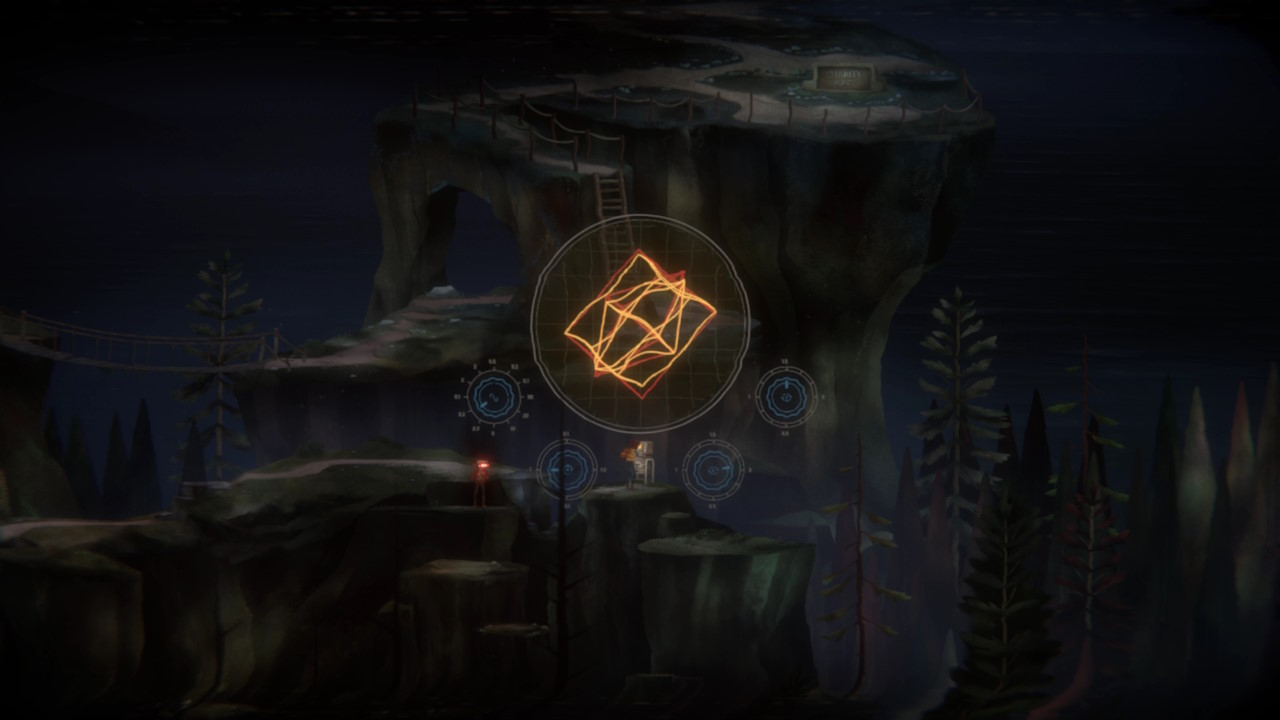
When you wake up again, head back up to where the General Store is still burning and head right. There’s now a weird machine on the bridge. Interact with it to trigger a mini-game where you’ll need to use both sticks to bring the shapes in-line. Now you’ll wake up yet again, and now need to head back up and instead go left, where there’s another machine. The puzzle is different but mechanically similar. Solve this one, and everything will go back to normal – only Jacob is missing.

You can follow your map back to where you first met Jacob, where you’ll find him again, freaking out about what happened and trying to fix his car. Talk to him and contact Evelyn. Regardless of what you say, you’ll be roped into finishing the job – which at this point means returning to the first transmitter. Take the radio and head on back up the hill.
On the way, your walkie-talkie will go off and you can listen to the three teens from the beach talking – or you can choose to interrupt, one of them – the ringleader – will call you back and tease you a little. Follow the same path as before, only now the locked gate is unlocked when you get there. Head up and up, then locate the first transmitter and interact with it.
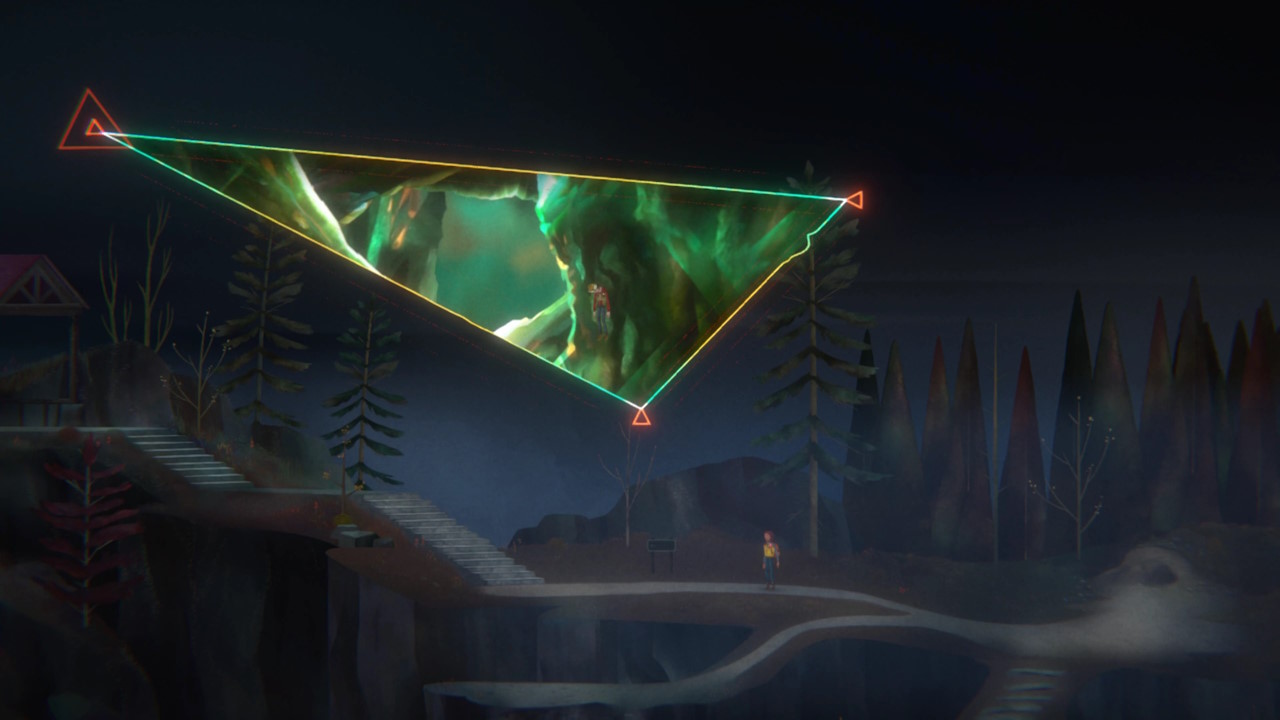
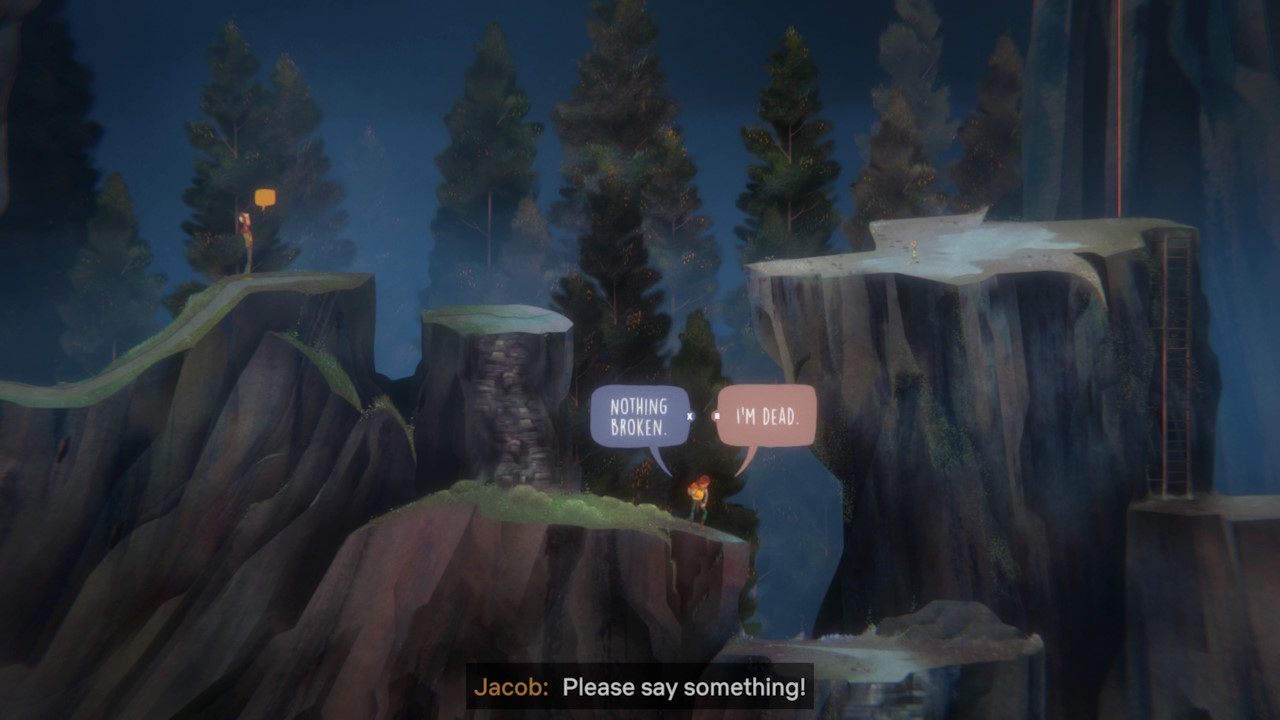
After some spooky goings-on, Jacob will become possessed by a strange spirit and start glowing red. He’ll walk away, so follow him, and when he starts to mumble and Riley says she has to do something, pull out the radio with the right trigger. Now you need to tune the radio until you feel a vibration and hear audio interference, which should be around 92 – 93. Hold it in that spot and you’ll notice a little triangle begin to form in the air.
Jacob will react, too. Take it up to 100, and a second triangle will form and Jacob will start to levitate. At around 107.7, a third triangle will appear and create a huge portal similar to the one over Edwards Island. Jacob will drop, free. Now a strange voice will talk to Riley, and after a short series of flashbacks, you’ll find yourself with Jacob, beneath the portal, with a strange red figure walking towards you. Speak to it or don’t, and you’ll awaken with Jacob on a cliff edge near the entrance to Garland, with a climbing anchor nearby. You need your climbing gear to use it, which you don’t have yet. First, you’ll need to make a detour.
Part 3: Jacob’s Cabin

Head to the right and you’ll find yourself at Jacob’s truck again, with a timestamp of 11pm. Go right on by the truck, and head up the steps and past the notice board. Now cross the river using the stepping stones and head right into Berenson’s Creek. Jacob wants to retrieve some journals from his “cottage”, but first you have to get in and he’s locked himself out. Classic Jacob!
Despite the solution being pretty obvious (there’s a ladder right there), you’ll need to jump through a few hoops. First of all, you need to try to get in, so head to the front of the house and interact with the doggie door. Even though it looks like Riley would easily fit, she cant, and all you can do is interact uselessly with the lightswitch, a broom, and the garage door opener that’s out of reach. Come out, go right past Jacob and up to the red side door. Interact with it to see that it is locked, but now you can interact with the open window above.
Go back down, grab the ladder, return to the open window, place it down then climb up. Once inside you can go right to Jacob or look through his stuff, so do that. You’ll find some expositional objects and then head downstairs. His phone will ring and you’ll get a creepy phone call intended for Riley.
Now let Jacob in and he’ll start looking through his journals, eventually finding what he needs and piecing together a few theories. Essentially, to close the portal over Edwards Island, you need to plant three more transmitters, equidistant and at an elevation of 3000m. Luckily, Jacob knows just where to get them, too.

Use your map to return to the General Store. Jacob will lead you round behind it and locate the spare key to get inside, where you’ll need to blindly interact with a backpack to retrieve your climbing gear. You’re now equipped to use climbing anchors, which will allow you much more freedom around Camena.
COLLECTIBLE #8
Once you leave, head up the hill above you and go right by the bulletin board. You’ll see a solitary flag, and you should now see something that wasn’t there before: a tiny flashing light on the ground. This is your first collectible of thirteen, which are correspondences that help flesh out the backstory of Maggie Adler and Edwards Island.
You can also now explore previous areas of the map and pick up the following Collectibles:
- Collectible #2
- Collectible #5
- Collectible #7
- Collectible #9
Click here for the guide for all the collectibles in Oxenfree 2: Lost Signals
Part 4: The Caves
Now equipped to climb, head back to Jacob’s cabin, and this time head up the hill behind it, and climb the rock face. Continue upwards to Waterhead Bluffs. Once in the next screen, interact with the climbing anchor to make a way downwards. You will reach a large gap, and acan either try to jump it or hop down – either way, you end up in the same place because gravity is a bitch. Continue down and you’ll see a cave opening on the left. Head on in.
Move through the small cave and you’ll emerge to find yourself shrouded in fog. A mystery man will call you on channel 5. Talk to him until he goes away, and he will immediately be followed by a guy who introduces himself as Nick Stuart, a local fisherman and retired amateur explorer. Pay attention to him, because he’s one of the people whose fates will be decided by your actions. You’ll notice that the fog has cleared, so head downwards to find the fisherman’s shack Nick tells you about. Head inside to locate his missing blue backpack, which is part of his “quest” should you want to get him out of this safely.

From the fisherman’s shack, head back up the climbable wall and go right then left into the next cave. You’ll see two climbing anchors above you which you don’t need to worry about yet. Go right through the cave until you reach some broken cables to interact with. You will need to descend to the cavern floor so keep moving down and left until you’re walking beside water. Cue an unsettling cutscene, so be prepared.
Eventually, you’ll find yourself below the broken cables, which you’ll learn is a derelict elevator from the old mining network. Keep going to find a canary in a cage and a climbing anchor. Use the anchor to go down and you’ll find a glowing golden tear in the air. For now you can’t interact with it beyond examining it. Head right until you reach the cave-in and Riley will suggest “using” the tear. So go do that.
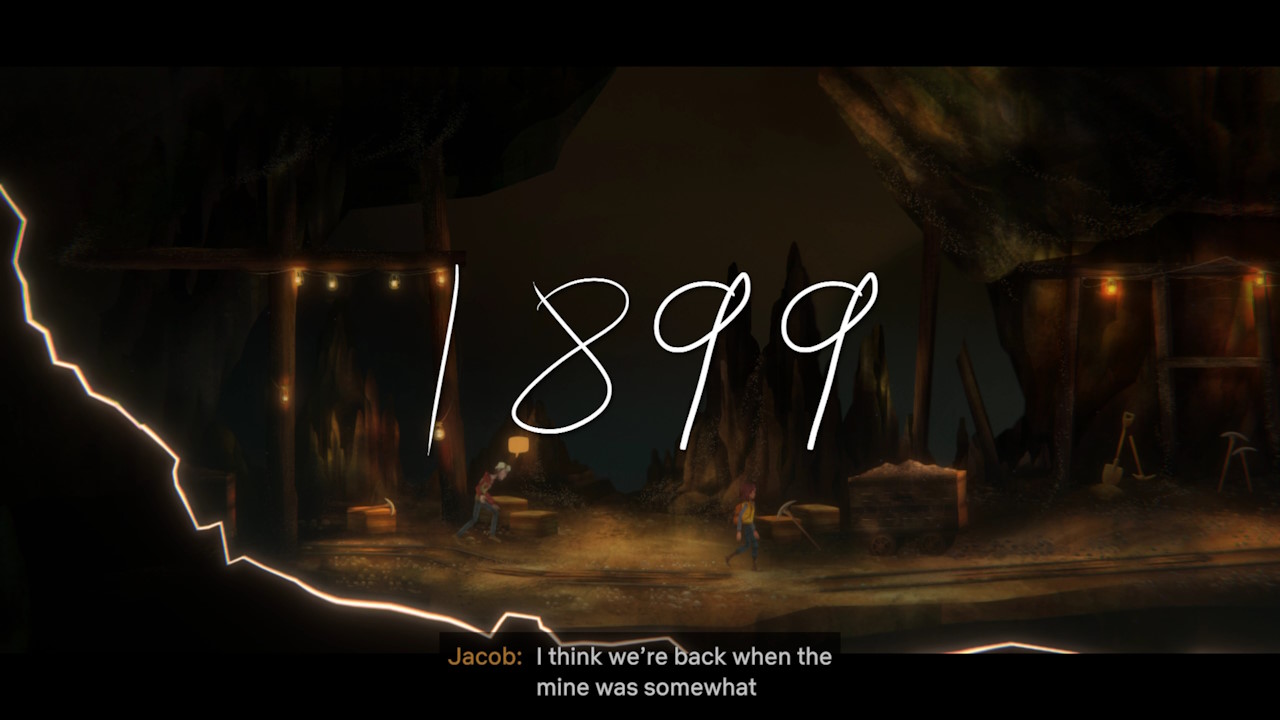
You’ll need to tune to the right frequency with your radio, but once you do, the tear will open. Interact with it to go through, and you will find yourself in 1899 when the mine was still in operation.
TROPHY: MERRY SCARY CHRISTMAS
Keep walking through the mine, and Jacob will suggest playing a game of One Word Story. This is an opportunity to grab a trophy, but only if you select the correct One Word Story, so pay attention to the following:
Jacob will begin the story with the word “ONCE”
You will now have three options to choose from. You need to select “SANTA”.
Jacob will chuckle and then offer up the word “ATE” to continue your story.
Here you now need to pick the option “FOURTEEN” to progress the story correctly.
Jacob will offer up the macabre next word of “CHILDREN”.
Now it is your turn and you need to choose “LOUDLY”.
If done correctly you will both reflect on the dark story of “Once Santa at fourteen children loudly”
If you told this story, you will get yourself the “Merry Scary Christmas” trophy/achievement.
Click here for our full trophy guide for Oxenfree 2: Lost Signals
Go back and past the bird, which has been replaced with a dead one, suggesting all was not well in 1899. You’ll find the elevator operational, but the lever is activated from the bottom, so only one of you can ride in it. Bring it down and Jacob will get in, but when you send him up the cave will begin to shake. To get out, Riley will need to jump across the gap, so send the elevator back up so that the top of it bridges the gap to wear Jacob is. Now climb up the ladder quickly, jump to Jacob, and return to the present.

After all that excitement, it’s nice to be back outside again.
COLLECTIBLE #10
As you are scaling the rockface, you’ll be tempted to just keep going upwards. However, once you’re near the top, actually make your way to the right, and round and down the slope to the bottom right to find a new collectible.
Click here for the guide for all the collectibles in Oxenfree 2: Lost Signals
Now head up to the cliff face, jumping from point to point, and lower the climbing rope for Jacob using the anchor. Head into the next cave, which moves right to left, and climb up the rockface. A few more steps in, and there’ll be a small gap to jump. Immediately after you do, Riley will get jump-scared and fall right off, landing below in the dark.
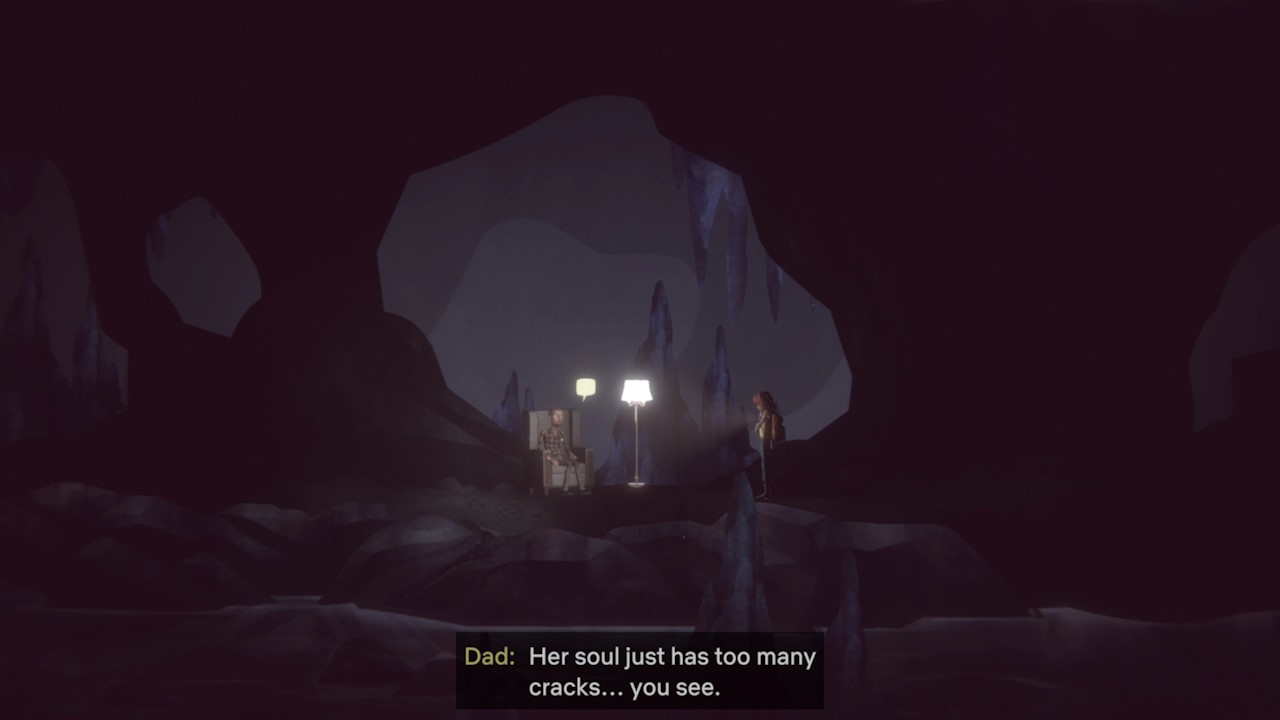
When Riley wakes up, she’ll be with her dad, quite possibly hallucinating an old memory of a time before they became estranged. Just follow the sequence, answering the questions however you see fit, until you eventually climb up to a ledge above. As you crawl under a tight overpass, the image will distort and you’ll find Jacob waiting by the ladder out.
Part 5: The Second Transmitter
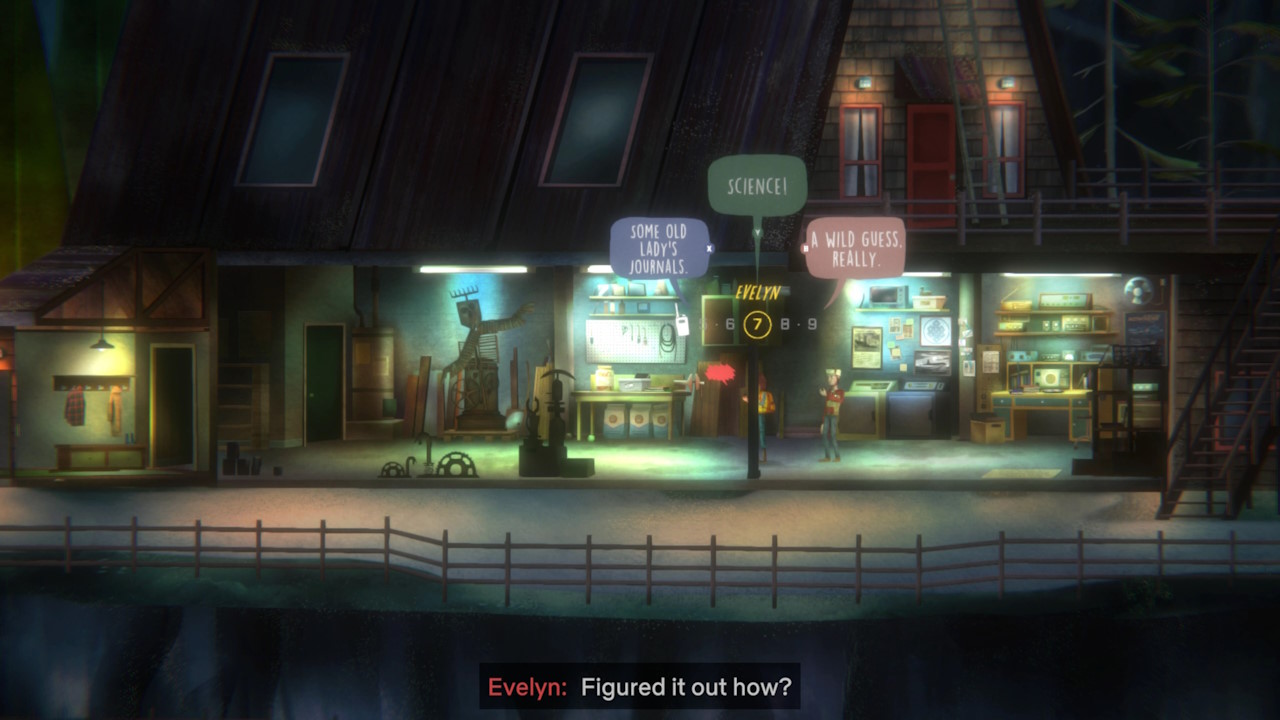
Once you’re back outside, go up to the left and into the next cave. You’ll hear a voice on the radio of someone called Violet, a friend of Olivia Massel, the girl who confronted you outside the General Store at the beginning. Jacob knows of Olivia, who’s the surviving daughter of the Massel family, the primary members of a cult known as Parentage that has been around in Camena for a while. Her parents were killed in a plane crash, leaving her to practically raise herself.
The cave will spit you straight out the other side without needing to walk through it.
COLLECTIBLE #11
As you make your way up Charity Point, you will notice an outcrop of rocks to your right. So before heading over to the left towards Violet, jump over to the right, and then down to reach the ledge with the shiny collectible.
Click here for the guide for all the collectibles in Oxenfree 2: Lost Signals
Now head back to the left beneath a small bridge to find Violet being accosted by a glowing red spirit on another bridge just beyond. Hurry up the ladder just in time to see Violet plummet to her apparent death.

At this point the world will distort, and you’ll be transported back a few metres. Violet will be up on the bridge, and Jacob will be sitting down on the ledeg by you. Both will have glowing, possessed eyes. Run by Jacob and up the ladder, and steel yourself for a short sequence of repeated teen suicide. Tell Violet not to jump when the option comes up, but she will anyway. Shortly after, Riley herself will fall, and you’ll find yourself back with Dad.
Finish the conversation, and Riley will be transported back to the present day. Jacob and Violet are still possessed, with the latter now walking along the rail of the bridge. If you head up and move towards her she’ll fall again, so instead go past Jacob to the right and find another radio tuning machine. Align the waveforms and Jacob will return to normal.
Now head back to the bridge where Violet is. If you want the best possible ending, you’ll need to make friends with Parentage. You can start here by being nice to Violet. There may be multiple choices that work, but during the conversation we chose “Take a breath”, “It’s not going to let you leave”, “Explain how to leave”, and “They won’t”.
When Violet is gone, head back to the right and up to Charity Point where you can place the second transmitter. Align the dish like before and watch the light show. Pat yourself on the back and head down, where you’ll see another bizarre hallucination, this one an apparent flash forward to Riley’s future. When it’s done, call Evelyn on Channel 7 and update her on your progress.
Part 6: The Ranger Station

Wander back down and head left, using the climbing anchors you saw earlier to get back down the hillside. Go back up to the right and re-enter Berenson Creek. When you’re back at Jacob’s house, you’ll have another vision, this time of Olivia trying to talk to her parents. It’s clear she misses them and wants to reach somewhere or something she calls “Planetshine”. When the hallucination fades, you’ll be back with Jacob.
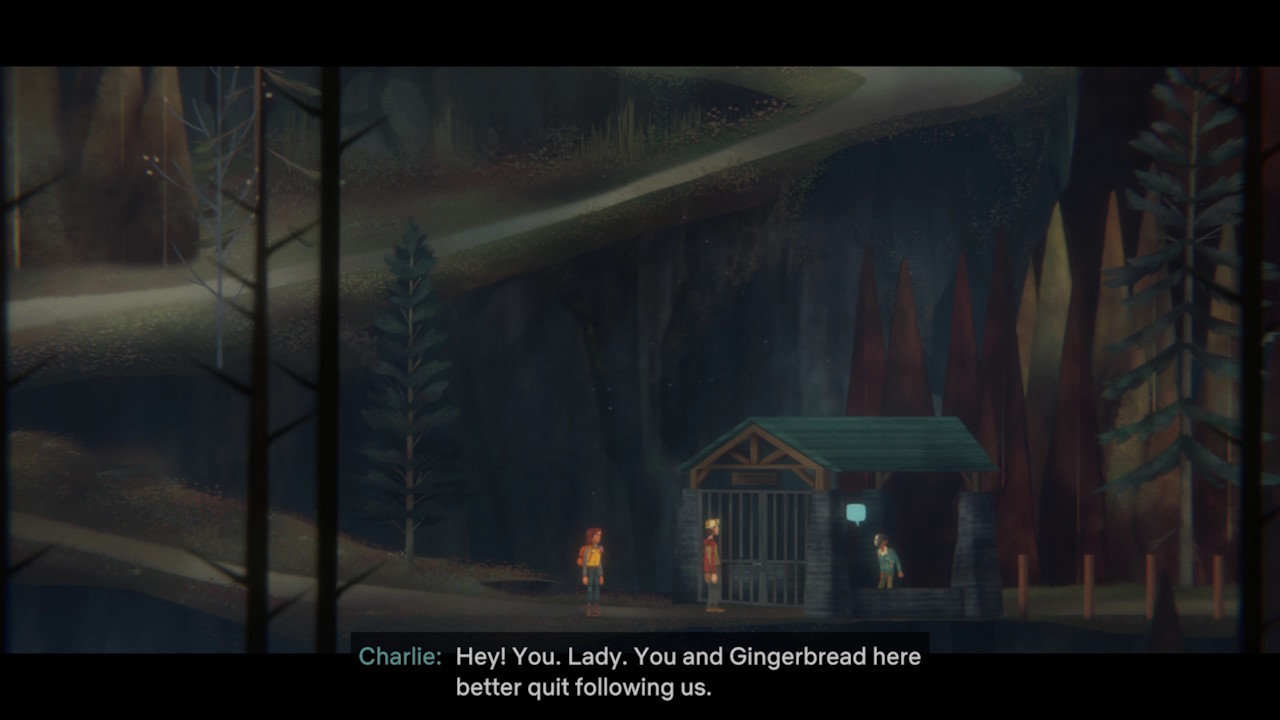
Go to the right from Jacob’s house and exit to Port Tilia. Your destination is the Ranger’s Station, where Olivia has sent her other accomplice, Charlie. Clamber down using climbing anchors and you’ll spot Charlie. When Jacob gives chase, shout encouragement and follow them. He’ll go through an archway and lock the gate behind him, and you can’t get through. As with Violet, you need to be nice to Charlie from here if you want to make friends with him. He’ll run off, but ignore him for now. You have more pressing matters, and you need the key from the Ranger’s Station.
COLLECTIBLE #3
Go back to the left, climb the rock face on the far side of the waterfall, and head left and down to snag another collectible from the ledge.
COLLECTIBLE #6
Now go over the stepping stones above the waterfall and stop at the bulletin board. Now head right through a semi-hidden path for another collectible.
Click here for the guide for all the collectibles in Oxenfree 2: Lost Signals
Then come back and take the path upwards to the Ranger’s Station. Go inside to find that it has been ransacked by Parentage.
You can explore the place a little, but you’ll need to use the phone to progress. Redial the last number called, as the other options are a waste of time. A Park Ranger named Shelley will answer. Tell her you need help, and she’ll go off to check on something, then come back. She’s easy to talk to and will tell you that she’ll help and you can find her on Channel 1 from now on. As with Evelyn and Nick, you’ll need to make the correct choices going forward in order to save her. She’ll tell you where the key is (it’s on the board by the phone), so take it and head back outside.

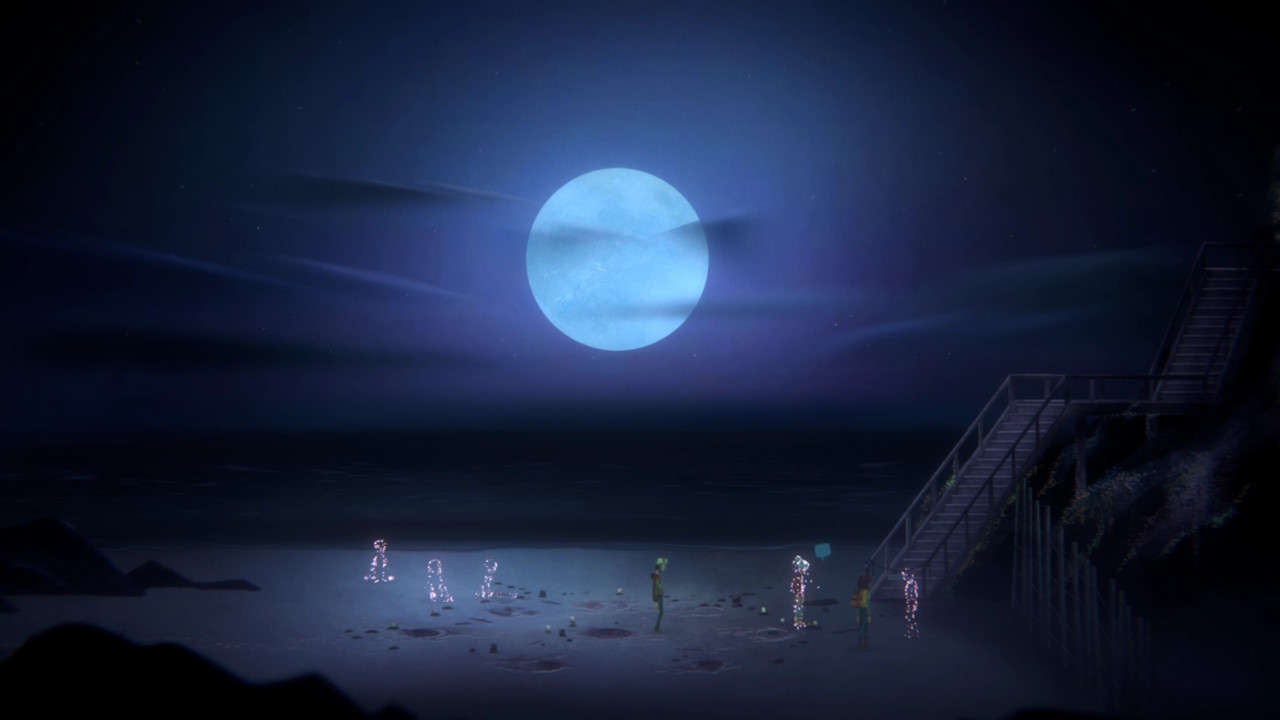
Go through the locked gate and make your way to the right. Eventually, you’ll drop down onto a beach and cross it under the light of the full moon. It’s one of the prettiest shots in the game, so drink it in. Once you’re on the other side, climb up and Jacob will spot Charlie and chase him again. Unfortunately, the cliff face he climbs will crumble, leaving you stranded on the beach. Once you’re alone, it all starts to get creepy again pretty quickly.
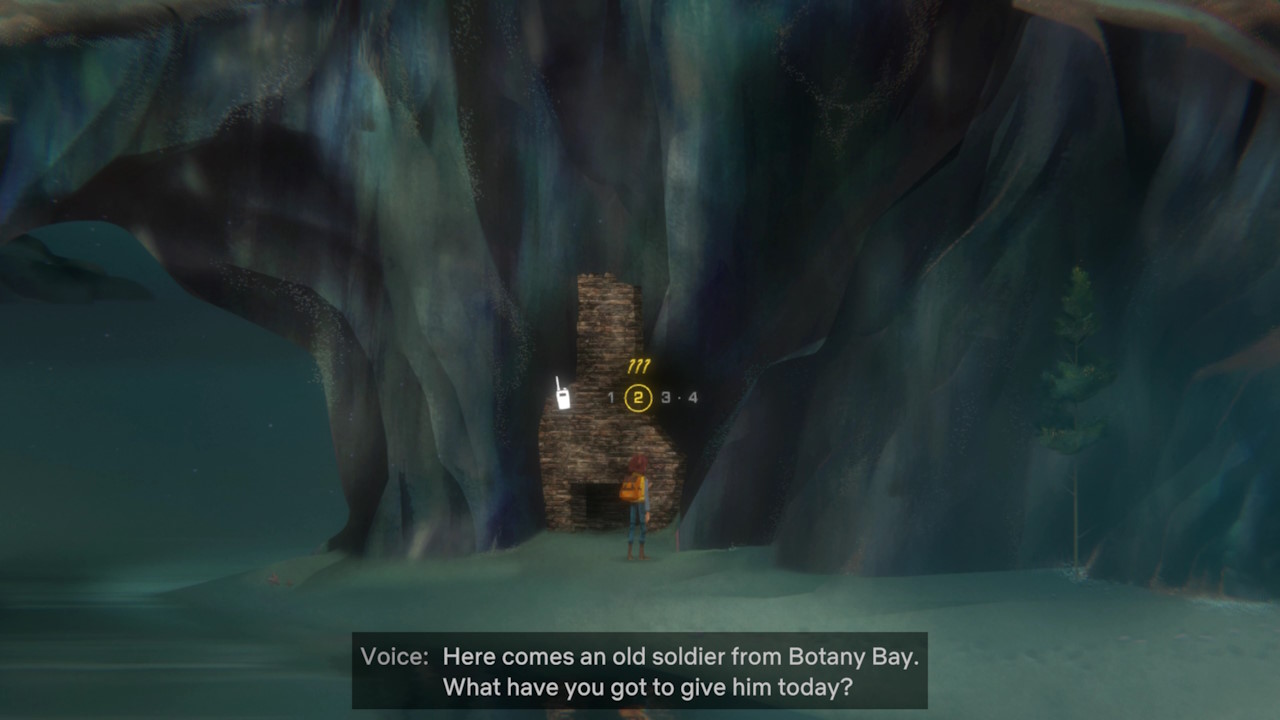
You’ll be contacted by a mystery caller on Channel 2 who wants to play a game of hide and seek. You can opt to not play, or even fail it, but if you’re trying to get the 100% completion you need to win. Follow the instructions you’re given, specifically the colder / warmer call-outs. The first target is a lamp to the far left of the area, just where you climbed up from the beach. Then you’ll be looking for an old burned-out fireplace at ground level, and finally, a cave entrance blocked by a boulder.
Part 7: The Third Transmitter
Move the boulder and enter the cave, and then follow the passage down to find an abandoned shoe. Interact with it to trigger a long flash forwards showing Riley and her eventual son, Rex. I don’t think you can make bad choices here, but after the sequence you’ll be back with Jacob on the beach, and he’ll tell you he lost Charlie.
Shake it off and climb up the rock face beside you and continue on (but dive back into the cave and collect the shoe – you need it later for an optional concern). When you enter the next screen it’s 1am, and you can contact Shelley for some advice here but she’ll just tell you to stop and smell the roses. Continue down and Jacob will spot Charlie again and chase him past some old graffiti-covered ruins.

When Jacob collars Charlie he’s furious, so you need to talk him down if you want to ultimately make friends with Charlie and rescue him from Olivia’s nightmare. We used the following dialogue choices going forward: “Back off, Jacob!”, “Tell us what you’re up to”, “God, you’re an ass”, “Woah, that’s too far!”. Now walk forward and interact when you see the words STOP JACOB. Now choose “Let me talk to him”, and “You explain tonight”, followed by “You need whose help?”
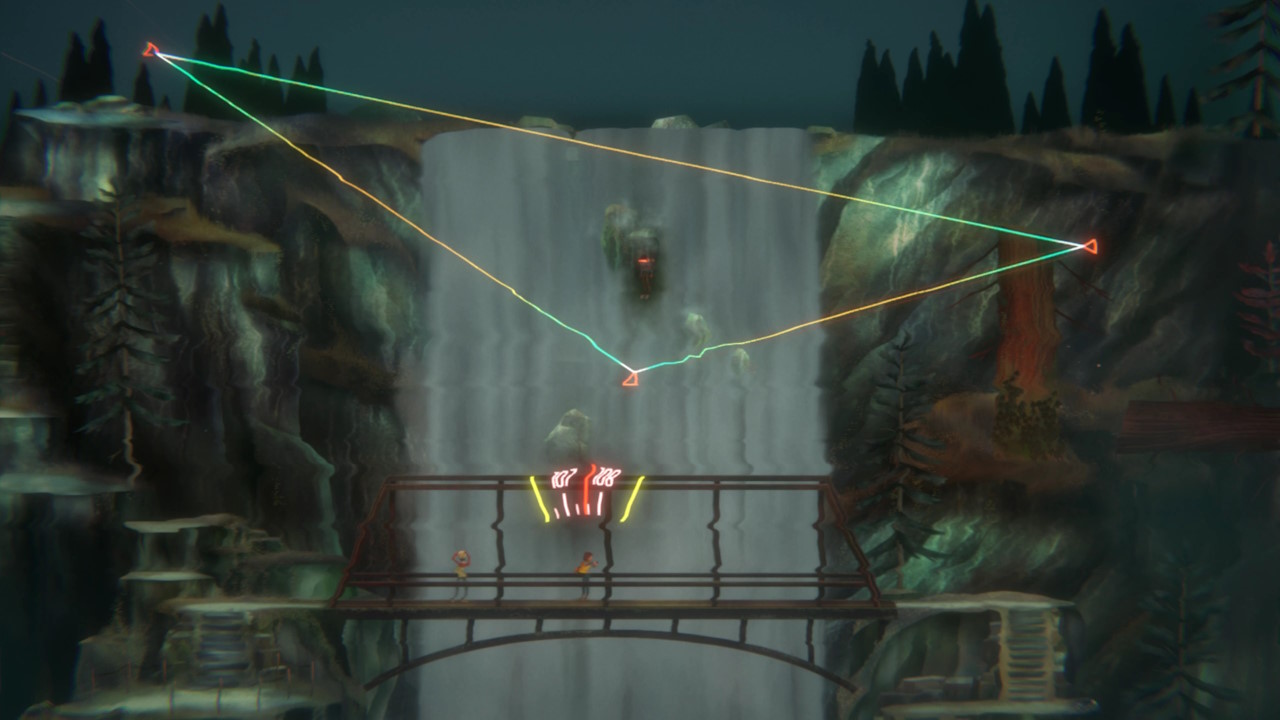
Now Charlie will become possessed and teleport to the ledge above you. Follow him up to find him on a huge bridge, still red-eyed. You need to tune your radio like you did when Jacob was possessed before. Spin the dial to 92, 101, and 107.7. The triangle will appear, and Charlie will be released to fall back to the ground.
After communing with the Sunken some more, check on Charlie to find that he’s alive but unconscious. You can’t help him, so Jacob suggests continuing on with your mission: plant the third transmitter.
COLLECTIBLE #1
Go right across the bridge and down to find a collectible on the stepping stones below you, then climb back up on the steps to the left.
Click here for the guide for all the collectibles in Oxenfree 2: Lost Signals
Go left from the bridge and scale the cliff face, Plant the third transmitter at the highest point and align the dish as you have before. Go through the flash-forwards, and then when you return to the present day, Jacob will be missing. Don’t panic, he’s down on the bridge, but Charlie is gone. Call Evelyn and update her, then continue on. If you head back towards the moonlit beach, you’ll hear radio chatter from Parentage that will clue you in on their plan. They intend to build a device to disrupt your transmitters – for whatever reason, Olivia is hell-bent on letting the Sunken into our world.
COLLECTIBLE #12
Despite being able to access this area before your reach Tootega Falls, this collectible won’t appear until after you have set up the transmitter there. Once you have, you’ll be required to backtrack through Horseshoe Beach. But instead of heading straight left, head down, back to where you began the “hot and cold” game earlier. Near where you found the Chimney in that game, on the beach, is now a shiny collectible.
Click here for the guide for all the collectibles in Oxenfree 2: Lost Signals
Part 8: The North Camena Community Centre

Parentage seem to be operating out of the town Community Centre. You’ve a long walk ahead of you now, as you need to go all the way back to the Uptown Harbour where Riley first woke up on the bus stop bench. Take this time to radio everyone: Shelley, Evelyn, Nick, and if you can, Maria. You can advance all of their stories by regularly interacting.
Shelley is courageous but will put herself in danger a lot if you don’t stop her; Nick will sail right into the eye of the storm unless you give him the knowledge he needs to survive; and Evelyn will lose her sister if you don’t persuade her to get into contact with her family. You can’t resolve everything at this point, but it’s worth remembering to check in with everybody as you travel.
TROPHY: 3AM FOOD FRIENDS
- The first thing to note about this trophy is that you and Jacob must be good friends at this point. Make sure to do everything possible during each conversation to be friendly and supportive towards Jacob.
- After you are returning from Tootega Falls, and heading towards North Carmena Community Centre, Jacob will strike up a conversation. Specifically, he will ask you if can ask you a dumb question. Reply with “Sure.”
- Note: This is the earliest this conversation can happen, if it doesn’t happen, keep playing and being nice to Jacob and he may say it later, after the Community Centre event for example.
- He will ask if you want to be friends after the adventure. Reply with “Yes But That’s Not a Dumb Question”. After a bit more chatter, he will asks “What do we call this new friendship?” and then you need to choose “We’re 3am Food Friends”. The conversation will then conclude and you will get this trophy.
Click here for our full trophy guide for Oxenfree 2: Lost Signals
Go right from Uptown Harbor and you’ll find yourself at the gates to the community centre. Head inside, and make your way to the top level where you’ll find a more powerful radio on a shelf. Head outside through the door to the right and inspect the antenna Olivia has built. It’s too sturdy to wreck manually, so you’ll need to power it down.
Follow the power cords downstairs, examing the various paraphernalia on the way. You’ll find a room with a poster on the wall and a heavy box on top of the wires. Move the box to find a secret door to the basement. Head downstairs and wreck all of Parentage’s shit – then freeze. The kids are back upstairs, and Olivia is furious.

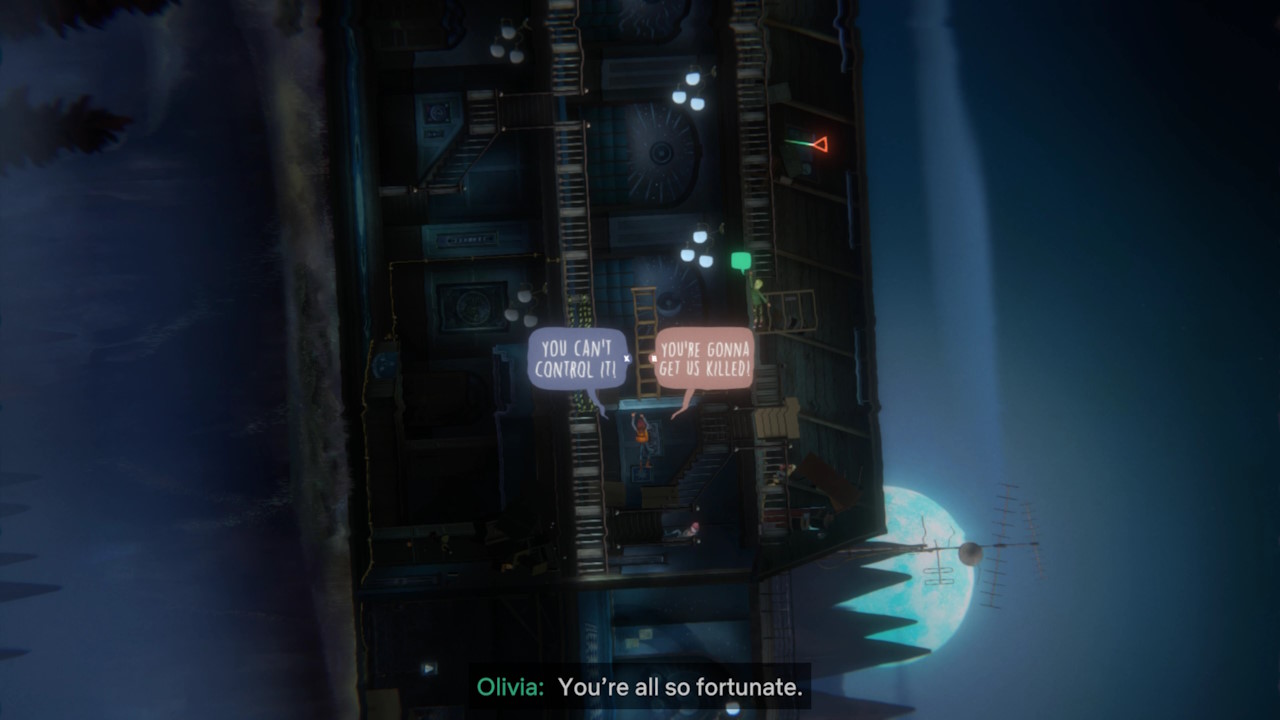
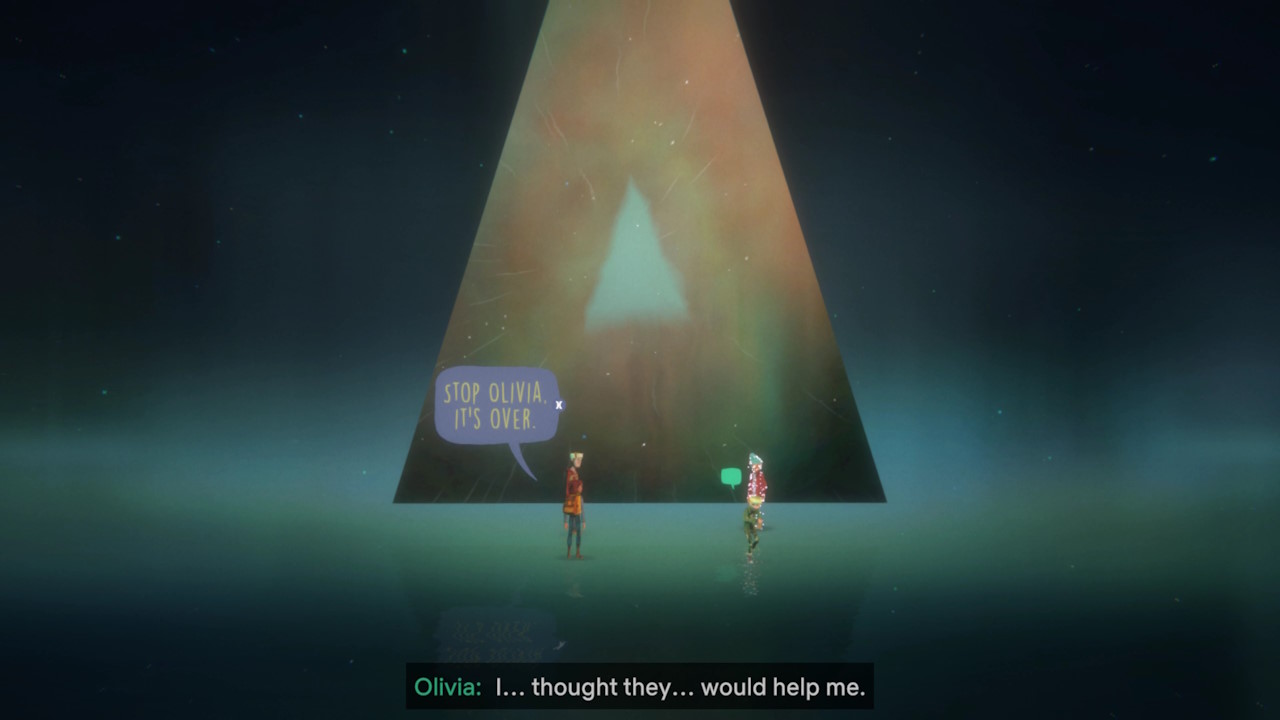
You can’t really avoid being caught so just head upstairs and confront them. Olivia will lose her shit pretty quickly, and she’s backed up by the Sunken. Do your best to talk Violet and Charlie down, and Olivia too, whenever you can. Eventually, though, she’ll pull out a radio and start trying to tune into the other world. You need to stop her.
The community centre will be distorted, tipping up on its side. Ignore the distraction and follow Olivia, interacting with her as quickly as you can three times to stop her from opening a portal. Eventually – if you succeed – gravity will realign and you’ll be able to take the radio off her. Choose whether to smash it or keep it – but either way, get ready for some revelations.
TROPHY: PROBLEM SOLVED AND SHATTERED
- This trophy centres around the key moment in the North Camena Community Centre when the Sunken appear, and Olivia tries to tune into the Portal. Your job as Riley is to prevent her from doing so.
- To earn this trophy, you need to successfully stop her three times from tuning the radio and activating the portal. Each time, the Community Centre will shift, knocking the radio to a new location. Head there as quickly as you can to disrupt Olivia’s plan.
- Once you’ve succeeded, there will be a lengthy conversation where you try and ascertain what is going on. Eventually, Olivia will ask for her radio back. When given the option, to pick, choose [Smash Radio]. This will get you the trophy.
TROPHY: ON TOP OF THINGS
- Like “Problem Solved and Shattered”, this trophy centres around the key moment in the North Camena Community Centre when the Sunken appear, and Olivia tries to tune into the Portal.
- Note: This trophy is much easier if you have befriended Violet and Charlie. View the walkthroughs for A Brighter Shade of Violet and Charlie’s Angel for help there. If you are friends, they disrupt Olivia when she is getting to each radio, giving you more of a chance.
- Your job this time, is to flawlessly execute stopping Olivia. She can begin tuning the radio to try and find the right frequency each time, but she mustn’t have too much time at any point to begin locating the right frequency to begin opening the portal. Once she runs off upstairs to grab the radio, follow her up, either using the same left stairs, or the right ones if you prefer. Just get to her quickly before the portal begins to open.
- Now the house begins to shake. You need to get to each new radio location before Olivia find the correct channel each time.If you succeed in this three times, you will get the trophy.
- For the first radio, you’ll need to head immediately right and then out the door, to the outside. Head down the ladder, and then back into the house, into the shrine area to pick up the radio.
- For the next one, head left, and then down the stairs to the ground floor, then hurry to the left, and then up the stairs to the radio location.
- For the final one, the whole house gets flipped ninety degrees and you’ll need to climb the bannisters vertically. Head to the one to your left and interact to climb. Swing right to the step-ladder, then climb some more and then swing back left to the bannister. You’ll reach a gap in the bannister you’ll need to jump over. Then jump up to the floor, shimmy to your right, and jump up to get the radio.
Click here for our full trophy guide for Oxenfree 2: Lost Signals
Turns out Olivia just really misses her parents, and some entity on the other side has promised her a way to get to them. But it’s not the Sunken – it’s actually Alex, the protagonist from the first game, who is trapped in the in-between and just wants out. Olivia and Alex have struck a bargain to send Olivia over in Alex’s place.
After Alex goes, you need to leave the Community Centre and follow Olivia. She’d gone to Garland, the abandoned mining town on the far left side of the map. As you head back to Uptown Harbor, Riley will confess to Jacob that she’s pregnant – so the boy we’ve seen in the flash forwards is already conceived at this point. Either way, you’ve got one transmitter left and you’ve slowed Parentage down for now.
Part 9: Garland and the final Transmitter

Head back to Uptown Harbor and you’ll hear a phone ringing (this may only occur if you’re up to date with Shelley’s story at this point). Go left and down towards Funnies parking lot, where the payphone is ringing. Answer it, then call Shelley and convince her not to go out on her current call. If you let her go, you’ll lose her. Be sure to grab the collectible from beside the payphone, too.
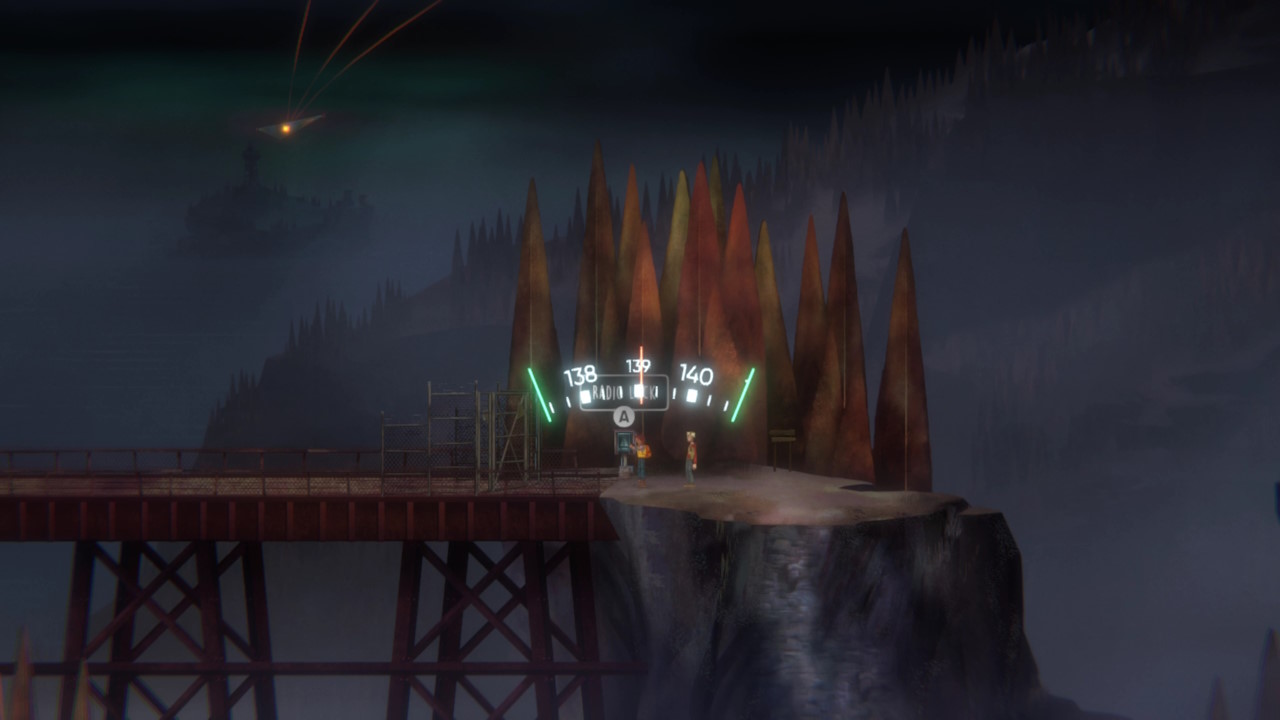
Once you’re done go up and to the left, past Jacob’s truck and through the tunnel towards Garland Mines. Go down the climbing point and scale the cliff face to the left, and use the radio to break the radio lock by tuning to frequency 139. The gate should pop open and let you through.
When you reach Garland graveyard, Jacob will suggest getting above the church to plant the final transmitter. But that means finding a way into the old mines somehow. Olivia will call you and tease you here, but you can choose to be nice if you’re still trying to win her over.
COLLECTIBLE #4
After you’ve crossed Garland Bridge and entered Garland Ghost Town, head to the upper left area, and you should spot a church. There’s also a cemetery here too. Walk through the cemetery, up the steps, and towards the flashing item on the floor. Go ahead and pick it up
Click here for the guide for all the collectibles in Oxenfree 2: Lost Signals
Go down to the NWMA building and note the strange machines dotted around. Olivia will call a second time here. Deal with her and then go down the ladder. To the right is an abandoned post office. Go inside and you’ll be contacted by Hank, the guy responsible for the machines. He’s been trying to snap a picture of anomalies and affected wildlife. His machines are called EMF Boosters, and can open small time tears like the one in the mine before. He will let you use them, but he’ll also ask a favour: he wants a picture of something living beyond the time tear.

TROPHY: I’VE HAD WEIRDER JOBS
- To complete this trophy, you need to pick up an item. You can get it well before you actually speak to Hank on the walkie-talkie for the first time. On Horseshoe Beach, where you play “hot and cold” with someone on line 2 of your walkie-talkie, it will eventually lead you to a cave. If you go in there, you can interact with a shoe, which triggers a scene with Rex on the beach. When you come to and can continue on towards Tootega Falls with Jacob, you actually want to go back to the cave instead. Move through it to find the shoe and pick it up. You can technically come back at any point after this to do this, but it makes sense to do it now as we’re passing by.
- Much later in the game, when you’re in Garland Ghost Town, you can explore the building to the bottom right of the town. This will be the postman’s office. Upon entering you’ll be greeted with a flash, and then Hank will contact you to tell you he’s investigating strange goings on. As payback for disrupting his work, he asks if you could do him a favour and take a picture of something strange for him. Agree to do this. Jacob will say it sounds like a bad idea but respond with “Well… Maybe”. Then interact with the unit in the house to switch it on.
- Use your caster on the tear to open it – you need to do this to progress the story anyway. Then you need to use the EMF transmitters to change the year the tear will take you to. The one next to the tear changes the century, and the one up the ladder from you changes the decade.
- The year you want to help Hank is 1930. So make sure the EMF transmitter up the ladder is on “3” and the one by the tear is on “9”. Then enter the tear. There should be a man sitting outside the building. Get Jacob to take a photo by interacting with the man. Exit the tear, and you can call Hank. After a couple of conversation choices, Hank will wish he had more concrete evidence at this point, so reply with “I Have A Shoe?”.
- He will accept your suggestion and ask you to leave it in a safety deposit box back in the Post Office. Head back there and do so. Then talk to Hank a final time and he will introduce his wife, after chatting to her, Hank will be grateful, and you will finally see the trophy pop up.
Click here for our full trophy guide for Oxenfree 2: Lost Signals
The machine up the ladder controls the century, and the one below controls the decade. You can’t adjust the millennium or the individual year. Set the date to 1890, and then go through the tear. You will now be able to cross the bridge and enter the mines, where there’s an exit tear waiting for you. Come out into the present day.
Follow the mines upwards, ever upwards, and then when you can head right to emerge outside, above the chapel. You’ll need to hop across onto the top of the stack, and climb up onto the very top. Unfortunately, as you plant the transmitter, Jacob will fall through the decaying roof. It’s a long way to fall, so you better get down and see if he’s okay.
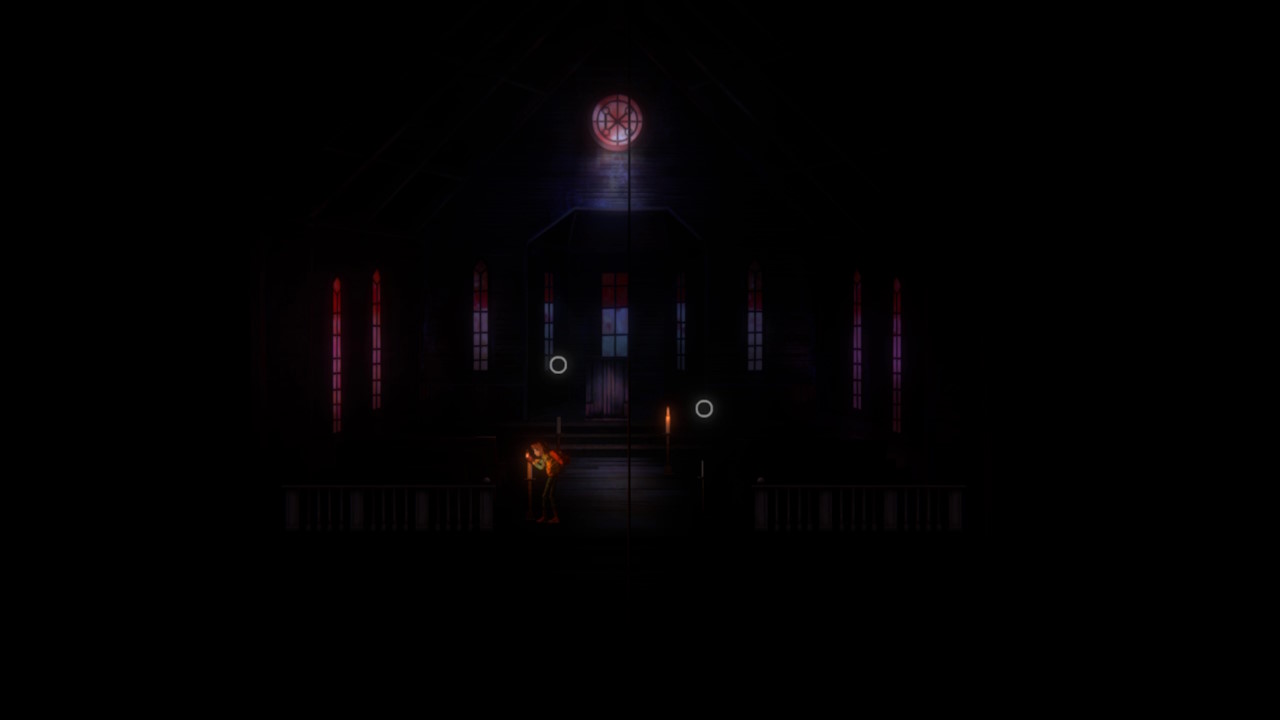
Drop down and lower your rope into the stack. Now descend the impossibly long distance, and you’ll find yourself in the middle of the creepy old chapel. There are four candles but only one is lit. Take another candle from the back of the chapel and light them in the right order. Failure will make you start again. There’s actually a solution in the small window above you, but you need to light them in the following order: bottom left, top left, bottom right.

Once the candles are lit, the Sunken will assault you. Fight them off by using the frequency distorter that appears before you. Align the waveforms as you have before to silence the Sunken and save Jacob.
Now you have to climb back up the rope and align the transmitter dish to finally complete the objective. So that’s it, right? All four transmitters are placed and activated, and the radio waves are triangulated – so the Sunken should be gone and you can relax, right? Well, for a few moments, yes. But it doesn’t last long.
Part 10: Before you go any further…
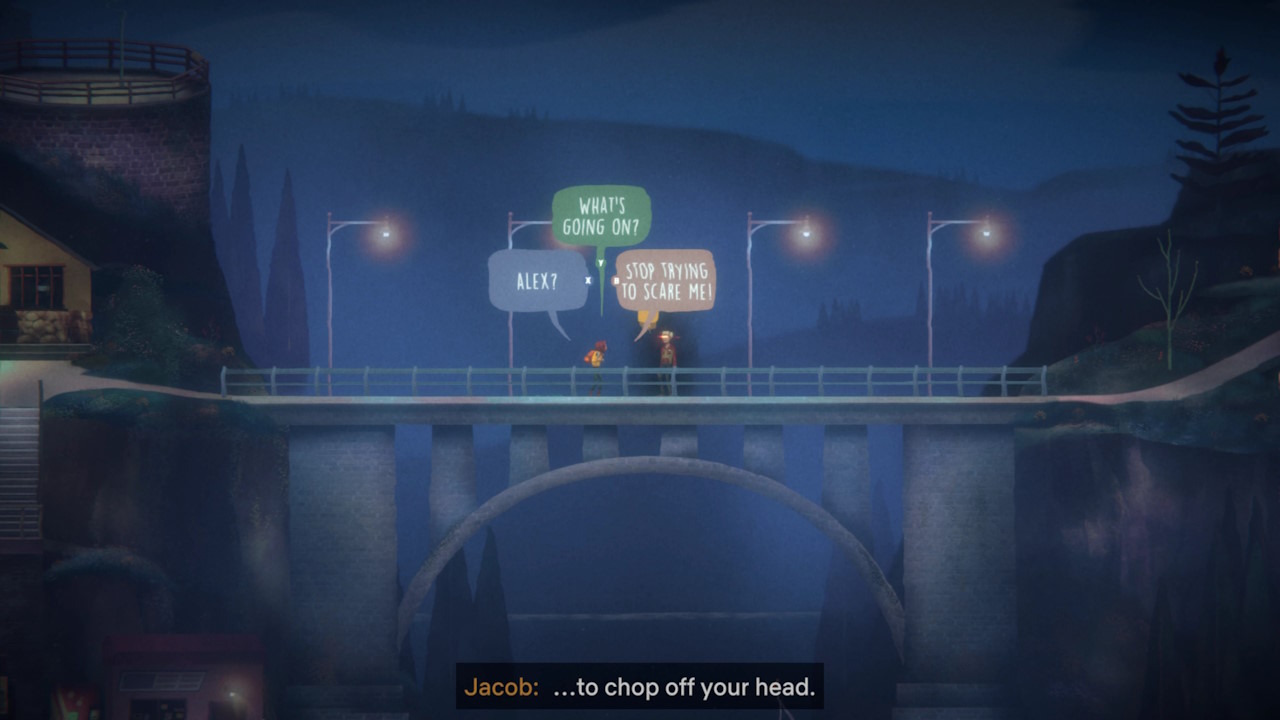
Head back to Uptown Harbor and prepare to enjoy the rest of the morning with Jacob – until you go as far as the bridge, that is. At this point Jacob will become possessed by Alex who tells you this isn’t over. The Sunken have been manipulating Olivia when she thought she was talking to Alex, and theyre close to coming over. Olivia has gone to Edwards Island to use the radio tower there to open the portal fully.
Go back to the Harbor and down to the dock. You need a boat if you’re going to follow Olivia. Luckily, the little speedboat there belongs to a friend of Jacob’s and he knows where to find the key. Head back up the steps and over to the Eva’s Got Worms bait shop, which is luckily unlocked. Go in, get the key, and return to the town square – where an unexpected friend will show up: Jacob’s dog Athena, who he has been worrying about all night.

Whether you choose to pet Athena or not, you’ll get a trophy, but you can’t get both in one playthrough without reloading the last autosave and replaying the section. Jacob is so happy to see her that he immediately ties her to the bus stop like a sacrificial offering and prepares to leave with you – while also reminding you to the point of annoyance that this is it: this is your final chance to tie up loose ends before you head to Edwards Island. Call everyone you haven’t already called and see if you can finish their stories before continuing.
COLLECTIBLE #13
You need to return back to Jacob’s Cabin in Port Tilia. Below Jacob’s Cabin, you’ll see a walkway that goes down towards a metal building on the right. Outside the metal building will be the final collectible on the floor. Pick it up for an emotional conversation with Jacob.
Click here for the guide for all the collectibles in Oxenfree 2: Lost Signals
When you get to the boat you have a choice to make: either take Jacob with you or force him to stay with Athena. If you leave him behind, he can’t influence the ending. If you take him, he’ll talk with you on the journey. If you leave him, Alex will appear and talk to you instead. Whatever you choose, this is it: so tie up those loose ends first!
Part 11: The Final Push
When you reach Edwards Island, follow the path up and right until you reach the beach where Alex and her friends are still in their time loop. Alex is lucent, and will guide you to the radio tower where Olivia is still bent on bringing the Sunken over. Climb up the radio tower and demand that the Sunken release the girl. They won’t, and Riley will be transported to a weird dark world.
Keep walking to the right until you reach a chair like your Dad’s from before. Sit in it for a creepy cutscene, then when you wake up, tune your radio to 101 beside the lamp. Now you’ll be back at the lighthouse from the very beginning of the game. Climb it, to find a young Maggie Adler at the top. Talk to her until you’re forced back into the dark world.

Now you’re in a bizarre room with four TVs, three of which are glowing red. Tune your radio beside each of the glowing TVs at the following frequencies: 90.7, 105, and 96. After a brief cutscene, you’ll be under a red light. Tune your radio to 101, and you’ll awaken at the fisherman’s shack, where you’ll find a grown-up Rex.
Talk to him, and he’ll give Riley some sage advice. When you get the option, choose (It’s not enough”, and then “To do something”. Rex will now send you back to the present. Now you need to tune the radio again to defest the Sunken and free Olivia. Tune it to 79.7, then 121, 94, and 79. The Sunken will be defeated, and you’ll be faced with a final choice.
Even though the Sunken are gone, the portal isn’t fully closed. To free Alex and her friends, someone needs to cross over. If Jacob is with you, you can ask him to do it, and if you’re friends at this point, he’ll go willingly. Or you can send Alex through, condemning her forever but saving all of you. You could also sacrifice Riley, but that would give up her future with Rex. Finally, there’s Olivia, who has made up her mind to go through and be with her parents.
Whatever you choose will effectively end the game, and only the final few cutscenes will remain, followed by a recap of all the choices you made and how many others made the same ones. I chose to let Olivia go through, which allowed Riley to return to Camena, where I chose to quit her job. She also spoke to a freed Alex and relieved Jacob, before settling down for a mostly happy life with her son. Whatever you choose to do, congratulations, you’ve completed Oxenfree 2: Lost Signals.
CLICK HERE TO GO TO OUR OXENFREE 2 TROPHY GUIDE
CLICK HERE TO GO TO OUR OXENFREE 2 COLLECTIBLES GUIDE


